Colin Hey's Workshop
January 2019
Dedicated 1500 Racing Car – pre-60s?
I have built up new oil cooler lines and fitted a new external oil filter to the 1500 race car, which wasn't a cheap exercise once all of the correct hydraulic fittings were purchased. The new setup certainly looks neater under the bonnet though, and changing the filter will be a lot quicker and cleaner. Taking the old setup off was a messy business as oil dripped out of everywhere as it all came off the car and apart.
July – August 2019
The last month has been "The Month of The Heads". For those who remember my item a couple of issues ago, the original Derrington cross-flow alloy head on our Wolseley 1500 race car developed a bad crack inside the centre exhaust port, and that combined with the fact that the combustion ratio was far too high due to it having been skimmed so often in the past, effectively meant it was now only fit for scrap.
This started my attempts to source a brand-new cross-flow alloy head from the United States, where a firm called Classic Car Performance were advertising them online. Effectively they are a copy of the Derrington's head but lack the HRG branding. They are also listed by UK and US branches of Moss Motors, the very well know suppliers of restoration parts and spares for British sports cars. Classic Performance was listing them as available, whereas Moss were listing them as back-order items, which I took to mean that they were only made to order, and then only when there were enough orders to make another run. Classic Car Performance was also a bit cheaper.
So I duly sent my order off, complete with a Visa number. Yes, a bit expensive, but I wanted to be able to continue to run the Weber carburettors and keep the car in its original as-built racing specification. A couple of days later I received an email saying they were awaiting another batch of 15 heads, and that I was 4th in the order list, and that they would email me mid-July to update a delivery date. This would, in theory, mean it should arrive around the beginning of August, in time to get it fitted and get the car running again for the season's opening meeting on 31st August at Levels Raceway, near Timaru. Good enough I thought.
Well, come the end of July and I still hadn't heard back, so I emailed them to check on progress. A reply soon arrived saying the foundry they use is really busy, and they won't now be available until September, so I decided to dig out a cast-iron 1800 head from the back of the shed with a view to using that with one of the Weber carbs in the meantime until the alloy version does finally arrive (hopefully). This would mean I'd have to spend some time cleaning up and modifying the combustion chambers and ports (I have an excellent small book by BMC tuning guru Clive Trickey explaining how to do this) and also it would mean buying an inlet manifold to suit. But at least it will get the car running again, and I can have a bit of fun towards the back of the field and perhaps improve my driving a bit in the meantime.
I got busy and stripped and cleaned the cast-iron head, but this revealed an old repair in one of the combustion chambers that looked a bit suspect. I also started to wonder if it may indeed be possible to have the Derrington head repaired, so I stripped that too and cleaned it properly as well. I called my brother Robert (a tradesman automotive machinist) and asked him if he could take a look at both heads for me and give me a verdict, which he's now done. He reckons there is perhaps a chance that the Derrington's head is saveable, but getting the crack welded will mean cutting a hole I the back of the head, welding the crackup, and then patching the hole back up again. He's getting his alloy welding expert to assess it as I write. Even if this can be done, I'll have to machine up a packing plate to fit between the block and the head to get the compression ratio down to something reasonable again. This will mean using two head gaskets (one on either side of the plate), and it may not work anyway. It will also take some time to get a packing plate cut out and then machined to exactly match the block.
The cast-iron head though was scrap material. Half a day of dismantling and cleaning wasted. Now it just so happened I had another, but it was still on an old 18/85 engine and gearbox that came out of an automatic 18/85 that I wrecked about two years ago to provide parts for the 18/85 replica rally car project I have down the back of the shed. I took the head off that, and it's now sitting on the workbench waiting to be stripped. The good news is that someone has already done a really good port and polish job on it, but the bad news is that it looks as though it too may have a small crack in one of the combustion chambers. Nothing for it now but to strip it and have it crack-tested.
August – September 2019
My search for a good cylinder head for the 1500 race car turned out to be fruitless. I was hoping to find a good cast-iron 1800 head to use until a new alloy one due from the USA arrives (theoretically sometime in September), and I spent quite a bit of time stripping and cleaning two spare ones I had at home, only to find they both had cracks in them. One is theoretically repairable, but it will need valve inserts fitted which might not be good for the hard time they will get in a race engine, so I've steered away from that idea. Instead, we've had a go at getting the crack in the original Derrington head repaired, which involved cutting part of the rear of the head open to allow access to weld the crack. This has now been done, but pressure testing the head revealed that it wasn't quite there yet, so it's gone back for another go.
September – October 2019
Unfortunately, there has been no progress on securing a new cylinder head for the 1500 race car. The US supplier keeps giving me excuses that they are still waiting for the foundry to cast the next batch of 20 (which they apparently already have 18 orders for), but this has been going on for 3 months now. Meanwhile, the race season has started, so it's a bit frustrating not having the car going, as I've missed two events already and am becoming adrenalin- deprived! It's also good to 'support the cause', as there are fewer and fewer entries in the historic and classic classes nowadays.
The Mk1 1500
January 2019
There was a persistent problem with it continually cutting out when cruising down the road.
I removed the bung and filter on the bottom of the tank. (Note – to get the filter out you also need to remove the fuel outlet pipe from the forward end of the tank, as there is a tube with fitting inside the tank that runs down into the filter that comes loose when the outlet fitting is undone, allowing the filter to be withdrawn through the drain hole). There was absolutely no sign of any blockage so that was a possibility eliminated.
Maybe it was the electrics. There could be a dodgy connection in the ignition or fuel pump wiring. The fuel pump had a crimped connection that wasn’t quite tight, so I got a new connector and soldered it together properly, and then I pulled all of the wires out of the fuse box connectors and cleaned them up as well.
It was while I was doing this that I noticed there were actually two wires running to the switch side of the coil, one of them bypassing the loom and running straight to the fuse box.
A test drive then confirmed that the problem was still there, but I found the engine would come back to life if I turned the ignition switch off and then on again. I then disconnected altogether the original coil wire running into the loom, and suddenly everything seemed fine.
A good long and hot run didn’t throw up any problem, so I presumed that there was some issue with the original wire (perhaps an intermittent short) causing the problem. However, time was to show that there was still a problem to be sorted.
While the car was up on the hoist I also took the opportunity to replace the clutch hydraulic hose and renew the slave cylinder seal, fix a leaking steering rack gaiter, replace the flexible brake hoses, and renew one rear wheel cylinder that was just starting to show signs of leaking. I also re-torqued the cylinder head down and re-set the tappets, as it hadn’t been done since replacing the head gasket a couple of months earlier. It’s now got a new WoF as well.
Later on in January 2019
I finally got to the bottom of the problem on our Mk1 1500. A new fuel pump seemed to make a bit of improvement, although the engine was still faltering from time to time and wouldn't idle nicely. I then turned my attention back to the distributor, and after looking inside I wondered if the small low-tension earth lead was broken or making bad contact. I checked the connections and moved the low-tension wiring around a bit, and nothing was broken, so I put the cap back on and tried again, and the problem seemed to have gone away. A short drive determined it hadn't. We had an Idlewood (Christchurch club location) working bee the next day, so I bought a new condenser from Spares and took it home and fitted it that afternoon. While I was at it, I decided I may as well replace the points, as I already had a new set sitting in a box at home. Close inspection of the points once out of the car showed they were very pitted, so that also may have been a contributing factor. Anyway, with the new points and condenser now fitted, everything was perfect - no hesitations, no misses on idle. Just as a double-check, I put the old fuel pump back on, and the missing returned, so I changed it back to the new one, and am happy now that the problem was a two-fold one, so it was never going to be easy to find.
The Hornet (Mini)
January 2019
It only needed a new heater tap, but I took the opportunity to flush and change the coolant too, and give it a good check prior to a WoF, which it now has too.
July – August 2019
The Hornet (Mini) is now back on the road after fitting new rear brake cylinders and shoes and refreshing the master cylinder. I also replaced the bearings in one of the rear hubs, and the rear brake return springs too, as I found one of them had at some stage been rubbing on the rear hub and was about 1/3 worn through. Swift Automotive sold me a brand-new replacement set for $18.00.
I also splashed out and bought an automatic brake-bleeding kit, as my no.1 brake-bleeding assistant has now left home and isn't always around when I need him. It has a 1-litre reservoir that clamps onto the master-cylinder to keep it topped up automatically, and a receiving unit which hooks up with a compressor to create a vacuum using a stream of compressed air. It's simply a matter of connecting a tube between the receiving unit and the loosened bleed nipple, pressing a lever down, and watching the fluid being drawn through the system. It only takes about 30 seconds a wheel, it virtually eliminates any chance of spillage, and it worked brilliantly.
6/99
January 2019
A clutch job. Although it’s easily possible to remove just the gearbox on its own, I chose to remove the whole engine and gearbox as one unit, complete with the front cross-member and suspension.
I did this so I can replace the front suspension mounts, and also replace the rear frost-plugs which
I thought (since proven correct) would be at the end of their life.
This was a straightforward job using the hoist – just a matter of removing the generator and carburettors, disconnecting everything, then lowering the whole engine/gearbox/suspension assembly onto the floor with a crane, and then raising the body on the hoist. It took Matthew and I about 4 hours to get it all out, including splitting the gearbox and removing the clutch.
The clutch itself was not too badly worn – rather surprising given it’s the original one and has done 110,000 miles, including some caravan towing. Instead, the lip on the gearbox main shaft seal had cracked and was letting oil through and into the clutch, hence the reason for it slipping. A thorough clean and careful reassemble completed preparation for the planned trip to the Brits at the Beach event in Whangamata.
This work was completed through the excellent support of Ray Willoughby at our Christchurch Spares and his ability to provide absolutely everything needed from his stock - clutch pressure plate, driven plate and release bearing, gearbox seal, bell housing to gearbox gasket, frost plugs (brass), timing cover gasket and seal, antiroll-bar bushes, cross member mounting bushes, engine mount, manifold gaskets, and oil filter. Where else in the world would any Wolseley owner get that service?
March 2019
I've now completed all the work on I wanted to do on the 6/99 while the engine was out, all I need to do is re-install the combined engine/gearbox/front suspension unit into the car.
July 2019
Since my last report not too much has happened in the shed, although I'm now very close to firing up the 6/99 again. It's basically all back together, however, when I was re-installing the clutch slave-cylinder the piston was very reluctant to move further up the bore now that the clutch has been replaced.
I took it off and disassembled it, and found the usual corrosion inside the bore, so it's away from being re-sleeved in stainless now. It was last off the car back in 1990, and I think at that stage I just gave the bore a light hone and replaced the cup seal, so it's lasted pretty well. I'm also taking the opportunity to replace the flexible hose, as it's the original one and was looking past its use-by date.
Talking about flexible hydraulic hoses, there is a good item about them I've borrowed from the Victorian Wolseley Car Club newsletter that is worth a read. In a nutshell, it says if you experience trouble with brakes sticking on, then one possible cause can be old flexible hydraulic hoses, which can collapse on the inside of the hose. I've found they can also cause problems when bleeding brakes for the same reason.
November 2019 – February 2020
I got the 6/99 put back together again after a year off the road (where did that go?) while the clutch was replaced and lots of other small jobs attended to at the same time, including replacing the steering box too. It's now WoF'd and out again running really nicely.
6/90
January 2019
I drained the coolant and gave the whole system a good flush-out. I also removed the thermostat housing and thermostat, and replaced the latter, as it had stuck in a half-open position (looked like it had been like that for some time, actually). It's since been taken for a WoF so is good to go, except that I've noticed a couple of the frost plugs are looking like they're close to the end of their lives, so that's going to be another job for this year by the looks of it. As an aside, I never, ever use steel frost plugs - brass ones are compulsory in my workshop!
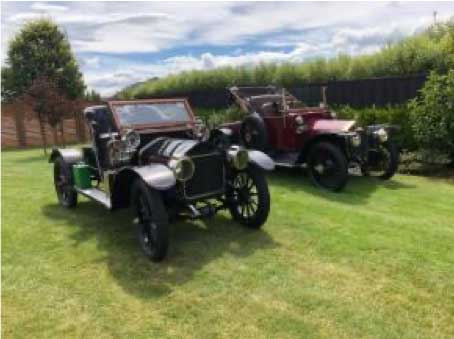
Veteran 12-16
January 2019
Preparation for the Dunedin to Brighton Run required a flush-out of the cooling system, so I took the water manifold off the top of the engine (which provides ready access around all of the cylinders in the block), and also removed the water inlet pipe at the bottom of the engine. There was quite a bit of sludge in the block, and the clean-out has definitely improved the cooling of the engine, so it was well worth doing.
The system relies entirely on the thermo-syphon principle to circulate water from the block into the radiator (there is no water pump), so the cleaner everything is the better. I also cleaned the magneto points and re-set the timing. It would have been at least 6 months since the car was last running, and after everything was reassembled it started on the second pull of the crank handle.
Ever since we've had the car, it's suffered a bit from a fuel starvation problem, caused by a lack of supply from the tank, which is in the boot of the car. It sits only slightly above the level of the carburettor, and unless that tank is completely full, there isn't enough flow when running on full throttle in top gear, or especially when heading even slightly uphill.
I tried to cure this last year by sealing up the tank and fitting a period-style hand pressure pump, and while this certainly did help, it didn't cure it completely, and it was also hard work on a long run. I had decided enough was enough, and I got busy and then fitted an electric fuel pump. I'm afraid the desire for reliability out-stripped the need for originality.
A few days later I drove the car into town also for a WoF (20km run each way), figuring that it would be a good test before the Brighton Run. It seemed to have fixed the problem properly, so now feeling a bit more confident, I put the car straight into the trailer when I got home.

September – October 2019
I've had both of the veteran Wolseleys out of the shed and fired up – both started easily despite not having been run since June. The 1909 car (Duckworth) needs a couple of small jobs done, as we're taking it down to the VCC National Veteran Rally in Timaru at the end of October. The main thing I want to do is fit a hand throttle to stop it from stalling when it's cold or warming up. It has to be able idle very slowly when it's warm so the engine slows enough to change gear easily, but with the idle speed set to enable that, it won't idle when the engine is cold. I bought an old-style Bowden cable motorcycle choke control lever off Trade Me that I'm now part-way through fitting up to sort that problem out.
November 2019 – February 2020
I have pulled the whole front of the 1909 Duckworth, had the radiator repaired (luckily it was an easy fix, as a seam had opened up slightly), and completely redid the accelerator, hand throttle, and choke controls with Bowden cables and proper fittings, and made up new mounting brackets for it all.
I also re-adjusted the clutch, mounted the radiator on some rubber pads and made up some new radiator hoses for it, and re-fastened the rear bonnet support channel, as the screws holding it to the firewall had mostly come loose or were missing altogether.
I couldn't get over how heavy the radiator was - I needed Matthew to help me lift it off and put it back on again - it probably weighs at least 50kg. With everything back together again, a few laps around the block confirmed that all seemed much better, so I put the car back in the trailer and we headed off to Clyde.
Working on Cylinder Heads
March 2019
Ivan McCucheon found an old cylinder head and had a look at machining off the inlet manifold to see where problems may occur. He found one problem when he went through to the water jacket opposite cylinders 1 and 6 and this can be overcome next time this is attempted.
Machining off the inlet manifold is an interesting project and I hope someone gives this a go sometime. My choice was to investigate fitting short bolts at the bottom of the manifold to leave as much of the manifold unobstructed as possible. This would be a subtle modification, needing a trained eye to see any difference from a standard cylinder head
when installed.
I had a chat to Ralph ? at Engine Rebuilders in New Plymouth and I was greatly heartened that he didn't think I was crackers for attempting this and that he remembered doing similar things to Ford engines.
I thought that a 'big-log' inlet manifold cylinder head from a 6/110 would be the best starting point because of better breathing potential, so I bought one from my branch of WCC (Manawatu). It turned out to be cracked, so it was sacrificed in the name of science and art; Ralph cut up a section of the cylinder head to see where the water jacket was in relation to the bottom of the manifold. We needed to know this because the bolt heads need a flat surface at the bottom of the manifold so each bolt can seat properly. For this, we needed to know how far down we could go to create a flat surface. It would also be an advantage to get the bolt head flush with the manifold if possible, so the bolt could be
completely out of the path of the airflow.
I got another cylinder head from the parts shed Manawatu parts shed and this one was good - no cracks. I got Ralph to give it a birthday - set up for unleaded, new valve guides, 3- angle cut on the valve seats and tidy the combustion chambers and ports if necessary. Now for the interesting bit…Only the middle four-cylinder head studs are in the way of the fuel/air mixture; the two pairs of studs adjacent to cylinders 1 and 6 are not in the way, so they were left as-is.
The holes in the top of the inlet manifold for the middle four-cylinder head studs were enlarged and threaded for 3/8" hex-headed plugs. The bottom of the manifold was machined flat for four hex-headed 3/8" bolts.
The heads of the bolts protrude up into the inlet manifold by 10mm. It is possible that Ralph could have machined deeper holes, but neither of us wanted to risk going through to the water jacket and the inlet manifold is largely unobstructed… certainly better than before!
All bolts and nuts are torqued to standard rating - 75 lb-ft.
Is it better? Good question! There are lots of variables that I am still working through. I fitted the cylinder head to my 2.6L Morris Isis in mid-2015. My goal was to get better fuel consumption due to a more even mixture going into each cylinder and hopefully more power!
When I first installed the new head the clutch slipped at full power when it was not slipping before, so perhaps more power, or perhaps the clutch was dodgy anyway.
I'm now getting 24mpg instead of 20-21mpg, but the car now has an overdrive gearbox and I've also re-centred the SU jets.
There are still some things to iron out: the non-standard camshaft is an unknown and the tendency for the car to hold back sometimes on acceleration is something I have not sorted out yet. I think it would be a good idea to get the car onto a rolling road to see if the SU needles can be better selected (currently they are standard 6/90 High Compression
needles).
I'm hoping that some other people want to give this a go. Perhaps the best time to do it is when the cylinder head is off already. The modification requires minimal invasive surgery and is difficult to see (if you wanted to have it look exactly right it would not be too difficult to attach a dummy washer, nut and small piece of stud to the top of the hex plug.
Another advantage is better clamping force due to the bolt pulling from the bottom of the manifold tube. The standard set up with the stud and a nut at the top will slightly compress the manifold tube, according to the engine workshop.
Wolseley 6
February – March 2020
Matthew and I have dragged the Wolseley Six out of hibernation. It was last on the road in 2013, when it failed a WoF due to play in the steering rack, and too much exhaust smoke, so there have been a few issues to sort on it.
We did manage to get it started without a problem (I was rather surprised at this because the fuel was so old), but it was only running on 3 cylinders, and it seemed to be only the rear 3 that were working. A quick check for spark revealed no issues there, so a look inside the fuel bowl on the front carb soon revealed the problem – the needle valve was stuck closed so no fuel was getting through. With it now running not too bad, I took it around to the local garage and filled it to the brim with fresh petrol, as there is no drain plug on the Six tank.
Fortunately, it was only about one-eighth full. I thought it would be a good idea to do a few miles then just to check everything was working properly, but this proved to be a bad idea. About 1km from home I noticed the oil pressure drop to about 30lbs and quite a bit of smoke started appearing in the mirror. The engine was still running really well though and there were no strange noises, and because I was only about 1km from home I kept going. When I got home I drove around to the shed on the lawn, and as soon as I stopped smoke started coming up from around the edges of the bonnet. I quickly opened it up, and everything on the right-hand side of the engine bay was just swimming in oil, and it was spraying out of the oil pressure gauge pipe. I quickly turned the engine off, and when I traced the pipe I found it had somehow become unclipped from the camshaft cover and had repositioned itself over the top of the fan-belt, cutting a small hole in the pipe. You wouldn't credit that so much oil could spray out of such a small pipe - I had lost about 2 litres.
I managed to successfully remove the short damaged portion of the pipe and join it up again, and then had to spend about an hour cleaning up the mess. Some of it had spread itself all over the front suspension and even down the underside of the car, so I'm still finding oil to wipe off it every time I'm under the car. Worse still, was that there is a steady stream of oil drops that start about 1km from home, then go through 2 streets in our subdivision, before turning neatly up our driveway. In time it will disappear, but in the meantime, everyone knows that the buck (oil) stops at our place.
Never mind – the environmental police haven't arrived yet! Anyway, we found a few other issues that needing attending to. The steering rack was replaced with one I that had overhauled a few years ago (soon after it failed its WoF), and the smoking has been temporarily stemmed with a bottle of Nulon Stop Smoke. I found one of the front callipers was partially seized, so took them both off and had them reconditioned, and also one of the rear brakes wasn't working at all, which turned out to be caused by one of the rear brake hoses collapsing internally with age, so both were replaced. We also replaced one of the CV joints and replaced the drive-shaft oil seal on the gearbox on that side too.
I have been working on a replacement engine/gearbox for the car, but it won't be finished for another month or so yet, so we'll do the National Rally and then do a swap later in the year. In the meantime, it's back on the road.